|
While I prefer current photos, with good lighting and well set up, with your pet, I can work with old photos too. (Many of
the little guys and gals in my portfolio have left us to wait at the "Rainbow Bridge.") The more samples you can send, the
more information I can glean, and all photos sent by post / snail mail, will be scanned and returned guaranteed mail. However,
if you can scan them in (or have someone scan them), and either e-mail them or burn them to CD, that can work quite well.
Any digital photos need to be as high a resolution as possible, for the most detail possible. 2 M works well. Sorry, but the
photos taken with the little cameras in the phones are seldom enough information to be useable. If you are shooting to film,
use high quality film, and have them processed by a reputable company, for quality photos. Also have them printed at the larger
size, not the little snap shot size.
For starters, taking good photos is seldom a one person job. Have some helpers, and to avoid frustration and confusion, only
work with one pet at a time. Stay up beat and cheerful, if you are getting frustrated, pause and try again later. Remember,
your pet doesn't know what this is all about, that you are looking for that perfect pose. Pressure on the pet will result
in the sad or even abused looks that we don't want. Have someone there to hold your pet, or hold their attention with a favorite
toy, or food. Make this fun!
The absolute, best situation is outside, on an overcast, but bright day. If it is a clear day, sunny, look for a bit of shade,
solid shade, such as by a building. Trees will tend to give you spotted shade, and mess with the coloration of your pet's
fur. You will need to keep the sun (even on an overcast day), behind you. If the sun is coming from behind your pet, their
face will likely be in shadow. Watch that your shadow doesn't fall on your pet.
Pay attention to the background. Unless it is a background you want included, I will not be painting it. However, a photo
of a black dog against a dark building makes it difficult to see the details of your dog. Try to have contrasting background,
such as a foliage behind the white kitty, not snow.
If your photo shoot must be indoors, follow the same principles of keeping the light source behind you, and watch for shadows.
Avoid using flash, as that tends to taint the colors of things, and red eye makes it difficult to see your pet's eyes. I know
a lot of dogs and cats who really shy away and duck their heads from flashes, they don't like the blinding effect any more
than we do! A well lit room, with sunlight coming in a window is best. Watch for the contrasting background.
You need to be down on your pet's level, sitting or even lying on the ground. A smaller pet can be up on a chair or table.
Make sure you pet feels comfortable, not like he is going to slip or fall. You can have someone hug the pet, as long as the
face is clear and visible. You need to be close enough to your pet to fill the view finder with your pet. Up close and personal
will give us the most detail.
Have a helper position themselves behind you, just off to one side or the other, also down on the pet's level, and get your
pet to look at them. They can use the toy or goodies to get the pet's attention. Having the pet looking right at the camera
is not always the best for a portrait, try for some with a slight angle to one side or the other. Also, try to avoid having
the pet looking up, it looks strained. Go for the perked ears, or even tipped head look, work those toys, treats and funny
sounds. See why it helps to have someone holding the pet?
You do not necessarily need to take all of the photos on one day. A variety of conditions can improve your chances of good
photos. Be patient and keep it fun. Watch for that "look" that so fits your pet. Like that cocked head that goes straight
to your heart! Sometimes, it is more a matter of just having the camera ready and handy, especially for photographing cats.
Yes, some of those good old, lucky shots work out quite well. If you think you see one in the making, shoot as many shots
as you can, while it lasts. "Pool Party" was chosen from dozens of photos taken that day. In some cases, background can be
improved for an action or group photo like "Pool Party."
About Resolution, what is it and why is it important?
Basically, resolution is a measurement of how much information there is in a graphic. A graphic is any picture you see in
a magazine, newspaper or in a web page; a photograph or drawing. The measurement unit is Dots Per Inch, or DPI, and it means
how many dots there are in a square inch of a printed graphic. The more dots in the inch, the more detailed a graphic will
appear.
I liken it to needle point. The plastic that is used for projects like the tissue box cover is really pretty course. There
are very few holes per inch, and therefore few stitches can be in an inch. Those holes and the subsequent stitches are like
the Dots Per Inch. The little pictures of flowers and stuff that are created are not very detailed.
Regular needle point, like our grandmothers did for chair seats, is done with a canvas that has more holes per inch, as many
as 100 stitches per inch. That is 10 holes high and 10 holes wide. That means a lot of little stitches and therefore a lot
more information in an inch. There is a very fine canvas out there with even more stitches per inch, called petitpoint. Petitipoint
can mean something like 400 stitches per inch (20 holes by 20 holes), and is very fine.
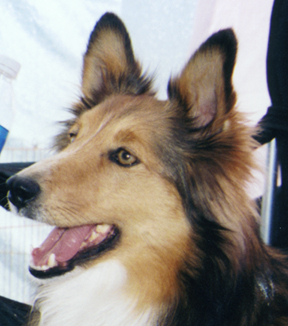
Now, think of the stitches as dots per inch. A typical graphic, like Shelby above, will look good on your computer monitor
at 72 to 100 DPI. On the computer monitor, the dots are referred to as pixels so, it is called PPI. But if it is printed out,
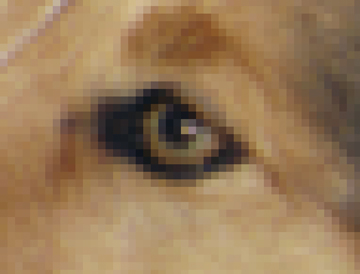
it will look fuzzy or even kind of chunky, especially if you try to print it larger. When you zoom in on Shelby for a close
view, you can see the individual pixels. This graphic will tend to print chunky, as in the close up, below. There is not enough
information for it to print smooth.
At the other end of the scale, the photographs you see in magazines are around 266 to even 300 Dots Per Inch. If you get a
really good magnifying glass and get the photo and glass right up to your nose you can see those little dots. The Sunday comics
are another good example, though they tend to be fewer DPI, somewhere between the PPI of a monitor and the DPI of magazine
graphics.
The more DPI, the more information or detail will be in the photograph. This kind of photograph is easy to see the details
for painting. I can see that Shelby’s eyes actually have a bit of green to them. My painting can be more true to life.

Unfortunately, the more information and detail in a photograph, the larger the photograph will be, in terms of how much room
it takes up in a digital camera or on your computer. In general terms, the more, or bigger the sharper the picture. But since
bigger photos fill up cameras and computers, a lot of people opt for the smaller files.
What we now have to look at, is how was the photograph created and saved. The photos that are created by cell phones are meant
to show on the little bitty screen of the phones. They are very low PPI or resolution. If you try to enlarge them to work
with them or print them, they come out looking blurry. You cannot regain the lost details.
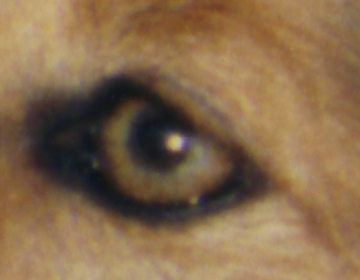
The settings on a digital camera will dictate the DPI. The larger the file, and the greater the DPI, the better the quality
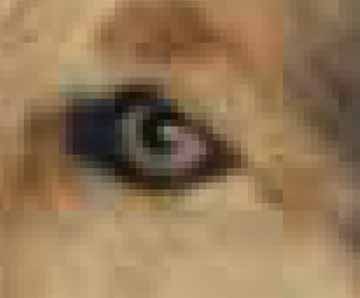
of the photo, like the sharp and clear photo of Shelby’s eye.
Depending on how the photo was created and saved, there may even be a pattern show up in the picture that looks like a parquet
floor. This close up of Shelby’s eye was saved as a low quality jpg. Such a photo is a very poor candidate for painting.
How a subject is placed in a photograph will determine how much information is available. The photo of Fawn and Darby running
on a green is a great action shot.
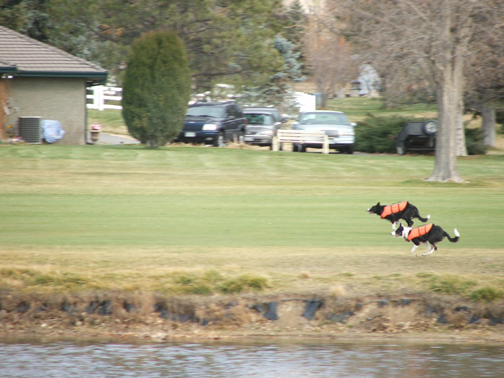
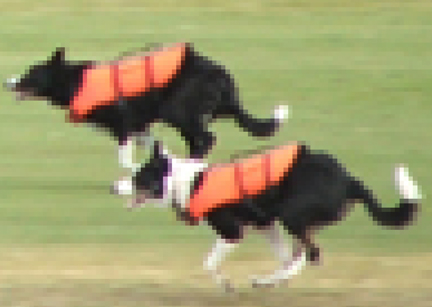
But if I need a photo of one of the girls to paint and I zoom into it, I just get chunky pixels, not much detail. They are
just too far away from the camera. To get a good picture of the dog, you need to be close up and fill the frame with the dog.
|